Introduction
Welcome to the Documents page for the the JADE Tilemap Editor!
About
JADE Tilemap Editor is a 2D Tilemap editor that allows you to easily create tilemaps for use with the Pikuma Game Engine and for the JADE ENGINE (Coming Soon!) This tilemap editor was created as a final project for the course "C++ Game Engine Programming". Check out that course here: https://pikuma.com/courses/cpp-2d-game-engine-development. The editor has been adapted to make 2D tilemaps for my new 2D SDL Game Engine I am currently creating.
The Editor is created completely using SDL2, ImGui, C++, and Sol2 for loading .lua project files.
Some features are as follows:
- Add multiple tilesets
- Zoom in/out
- Undo/Redo
- Add box colliders
- Save to a .map or .lua file
- Allows you to save your project to again later
Getting Started
I have not loaded any releases to github as of yet, so the editor must be built by src. I will be creating a premake build script shortly. Also, the code is not yet cross platform, so it will most likely only work on windows machines. Feel free to try to add your own implementation for Mac/linux.
Once the editor is open you can start working on your project. The first thing you are going to want to do is add the required tilesets for your project. You can do this by going to the tools menu and adding a tileset. See the Adding Tilesets page for more information.
Add Tilesets
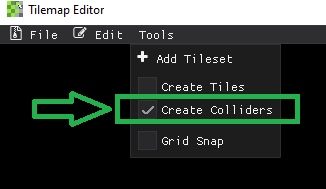
To add more tilesets to your projects, go to the Tools menubar drop-down list and select
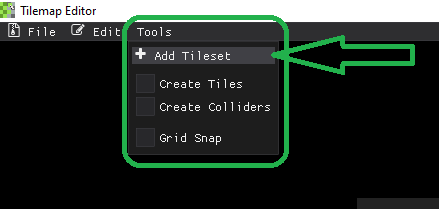
This will open a file dialog that will allow you to choose your tileset. The supported image types are .png, .jpg, and .bmp
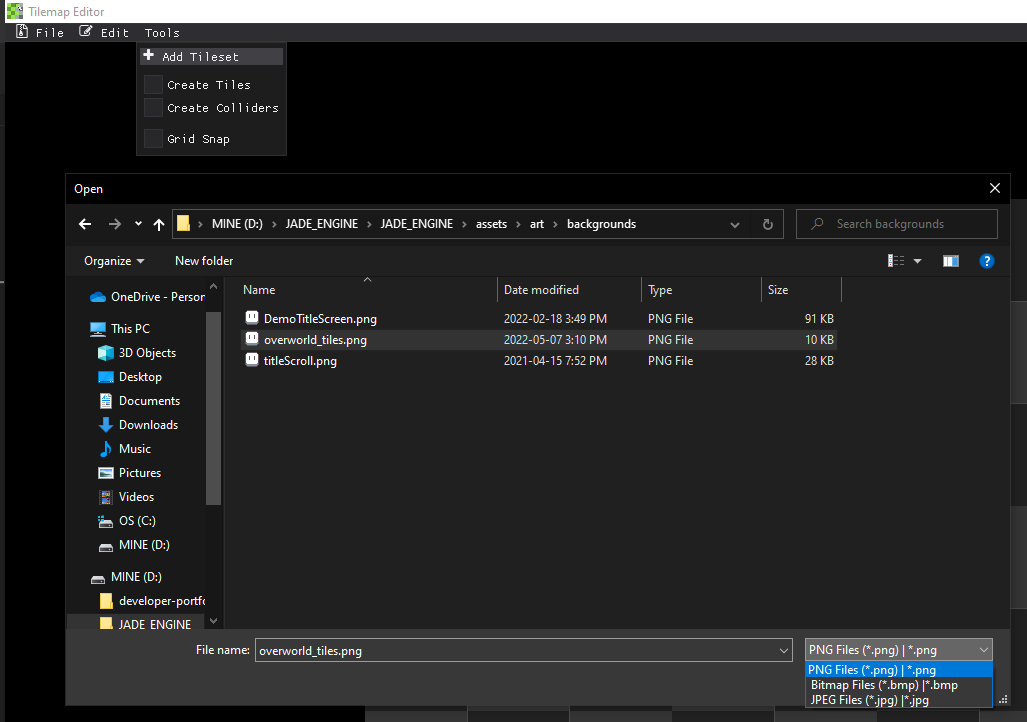
This will add the tileset to the loaded tilesets for that project.
Creating Tiles
To start creating tiles, you are going to want to have tilesets already added to the project before proceeding. See Adding Tilesets for more information on adding tilesets.
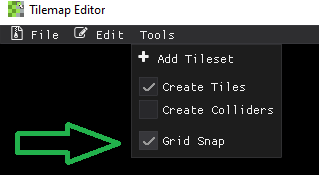
Once you have at least one tileset added, go to the Tools menu and check the Create Tiles checkbox:
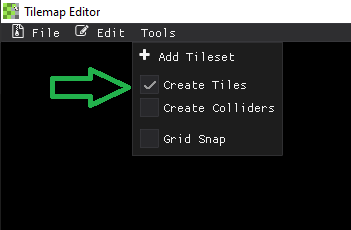
This will open up the create tiles window and allow you to select the desired tileset to use:
This will allow you to choose from all preloaded tilesets and will set the asset_id of the current tile to the name of the tileset.
Selecting a Tile
To select the desired tile to place just click on the image in the Texture box of the desired tile you want to use.
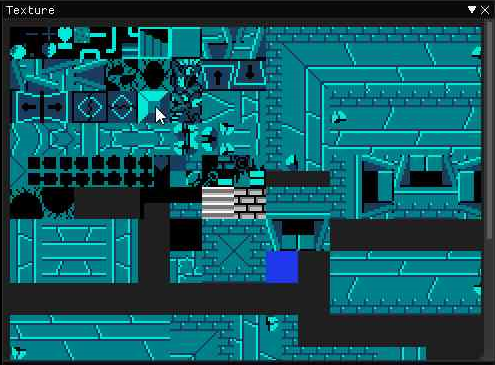
After selecting the tile, the tile will follow the mouse cursor. You are able to place the tile anywhere on the grid by pressing the Left Mouse Button.
If you want to remove a tile, you can remove it by hovering over the you want to remove and press the Right Mouse Button. This will remove the tile from the registry. If you accidentally placed a tile, you can go to the edit menu and click the Undo or hit the keys Ctrl + Z.
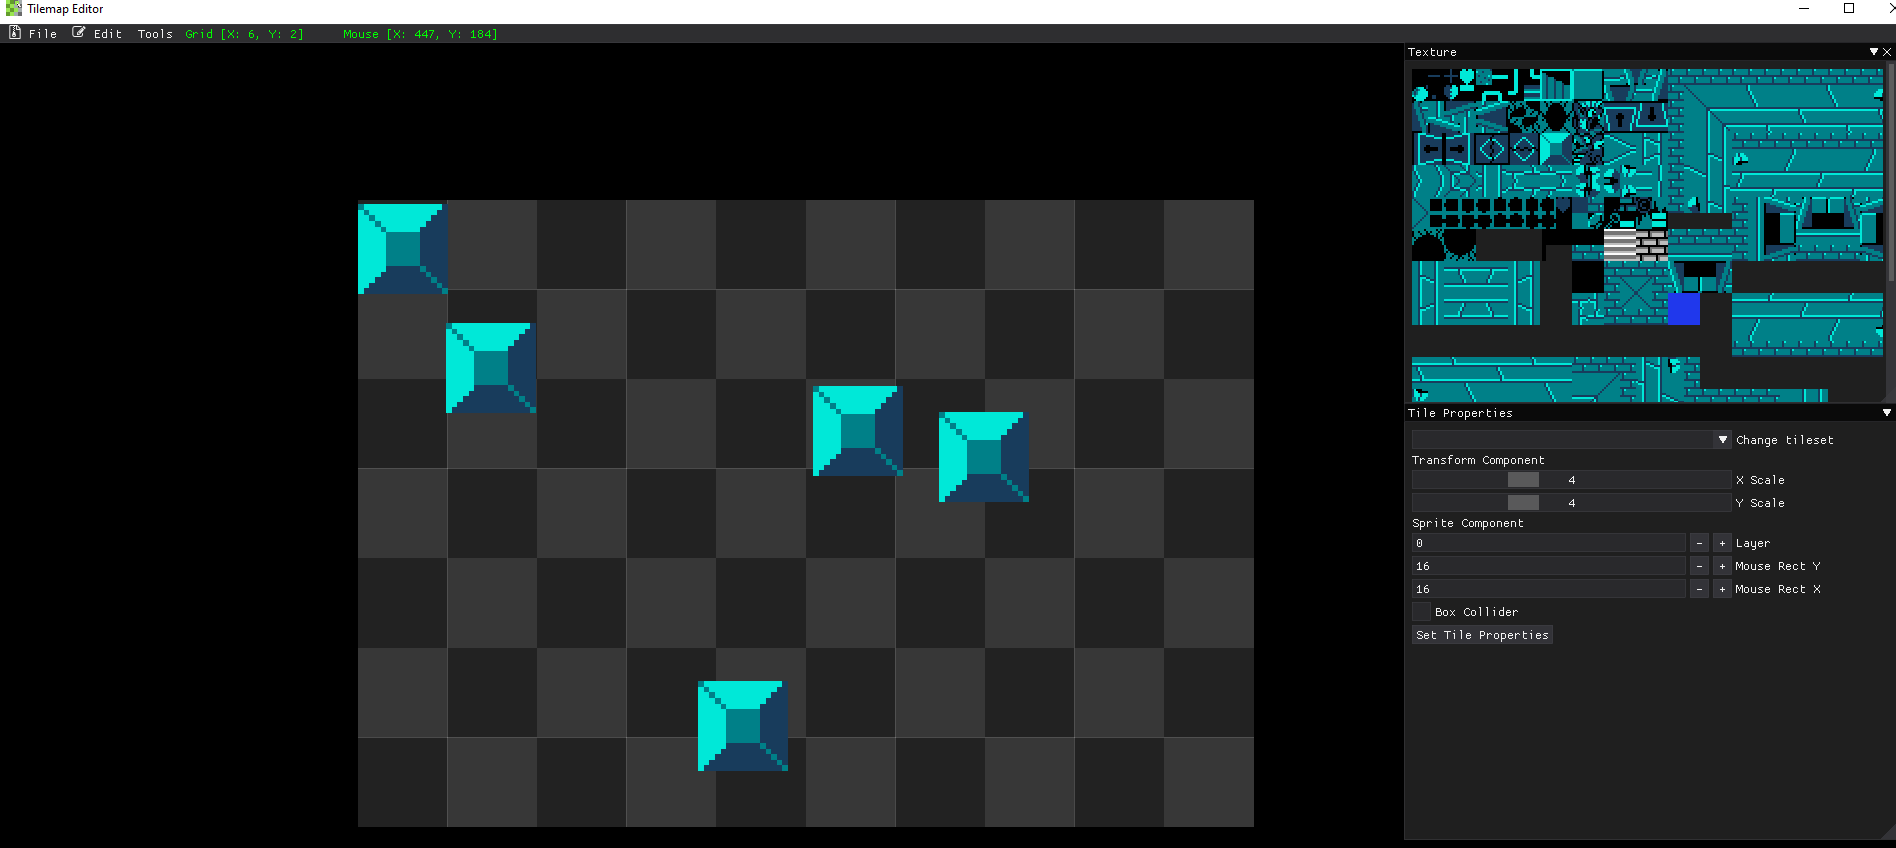
By default, you can place the tiles anywhere on the grid with full control of where on the grid the tile is placed. If you want the tile to only be placed perfectly in each grid location without any overlap, go to the Tools menu and check the Grid Snap box.
The grid snap option automatically snaps the tile into the next grid location when moving the mouse around allowing for a cleaner look to the tiles; however, the free floating tile option is still there if you want to place tiles in a position that is not perfect to the grid.
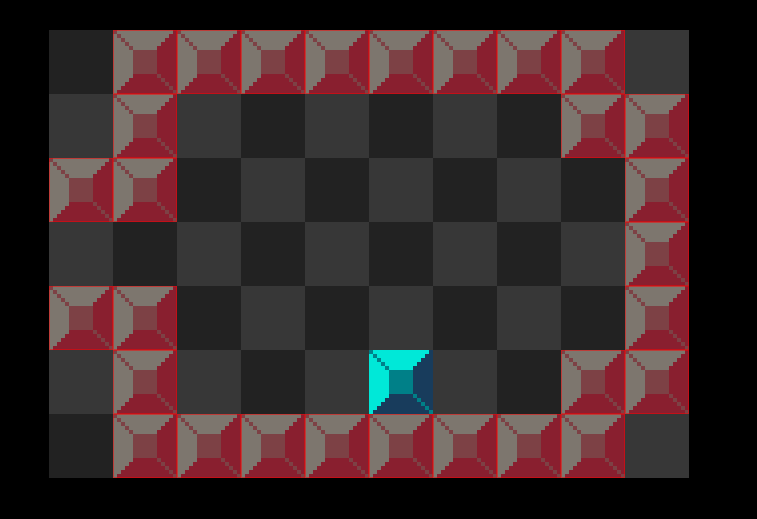
 Example of using the grid snap option!
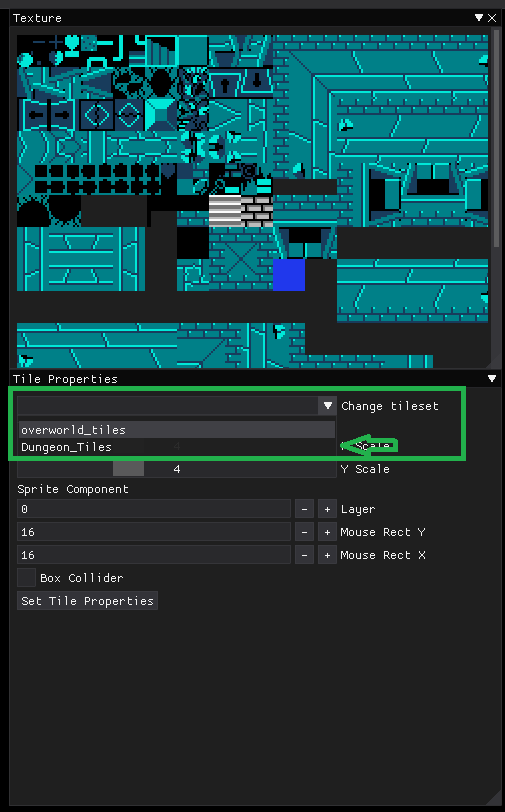
Tile Properties
Each tiles has a list of properties that you are able to change from the editor. The properties are as follows:
-
Tile Scale
- The scale property allows you to increase or decrease the scale of the tile in the x and y coordinates. So if you are using [16x16] pixel tiles, a scale of 4 would make them [64x64] pixels and so on.
-
Layer
- The layer property is your z-index of the tile. This is used by the render system to draw the tiles in ascending order. Therefore, if the first tiles layer is 0, the tile is rendered before any tile with a higher layer. The tiles with the higher layer value will be rendered on top. You do not have to create different layers in the editor, just set what layer you want the tile to be on and the render system handles the sorting.
-
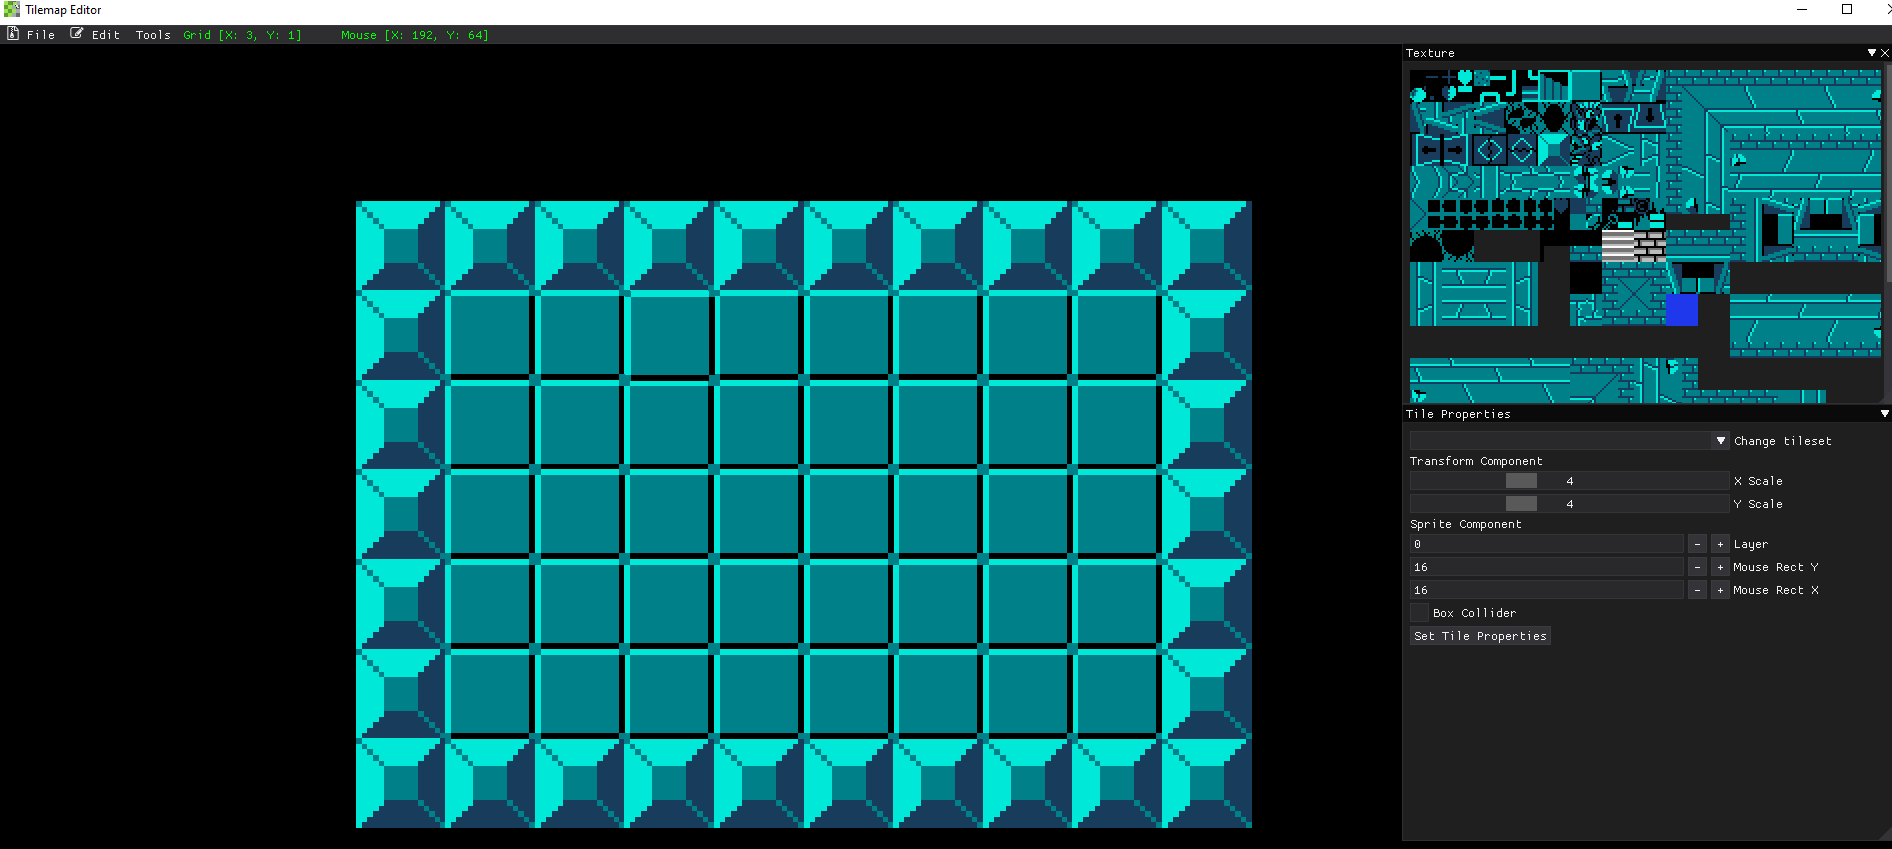
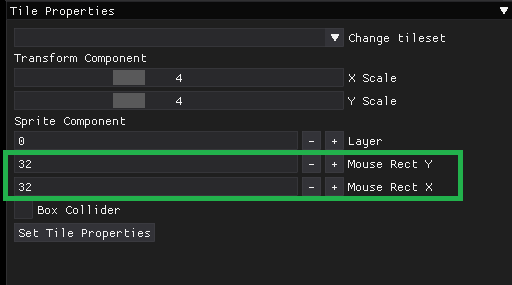
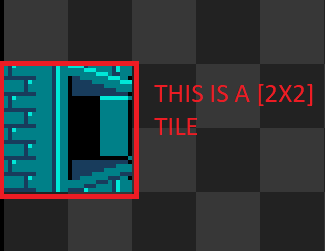
Mouse Rect X/Y
- The mouse rect property allows you to select the size of the texture to parse. If the tiles are [16x16] pixels and you set the mouse rect to [32x32] pixels, the tile will be a set of [2x2] tiles:
-
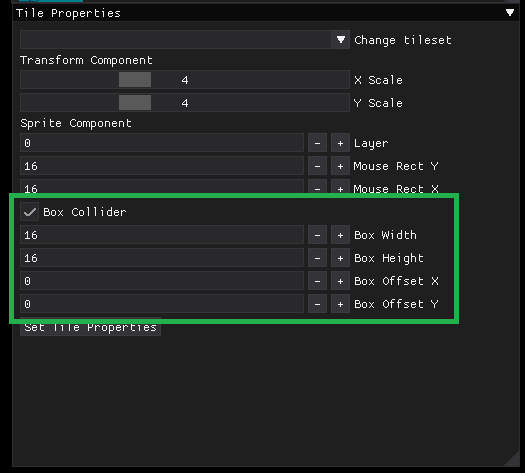
Box Collider
-
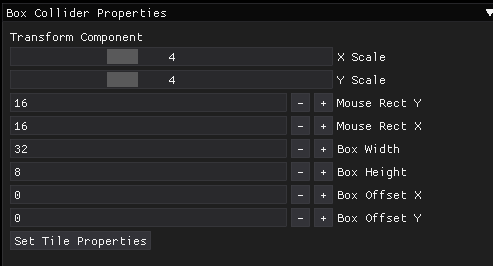
The box collider property allows you to add a box collider component to the tile. To add a box collider you want to check the box collider checkbox. This will open up more properties to set the box collider. Those properties are as follows:
- width: The desired width of the box collider
- height: The desired height of the box collider
- offset x: The x offset of the box collider from the tile origin [0,0]. (Top Left corner)
- offset y: The y offset of the box collider from the tile origin [0,0]. (Top Left corner)
-
When the box colliders are selected, the tile wile be rendered with a red box surrounding it. This way you know what tiles are actually box colliders.
-
Creating Box Colliders
There may come a case where you want to create separate box colliders that are not associated with any tiles. You can do this by checking the Create Colliders checkbox in the Tools menu.
Once selected, the Box Collider Properties Box will appear. In this you can set the size, scale, and your offsets.
The colliders that are created will be rendered on top of any tiles you may already have there and will be of a slightly transparent red box.
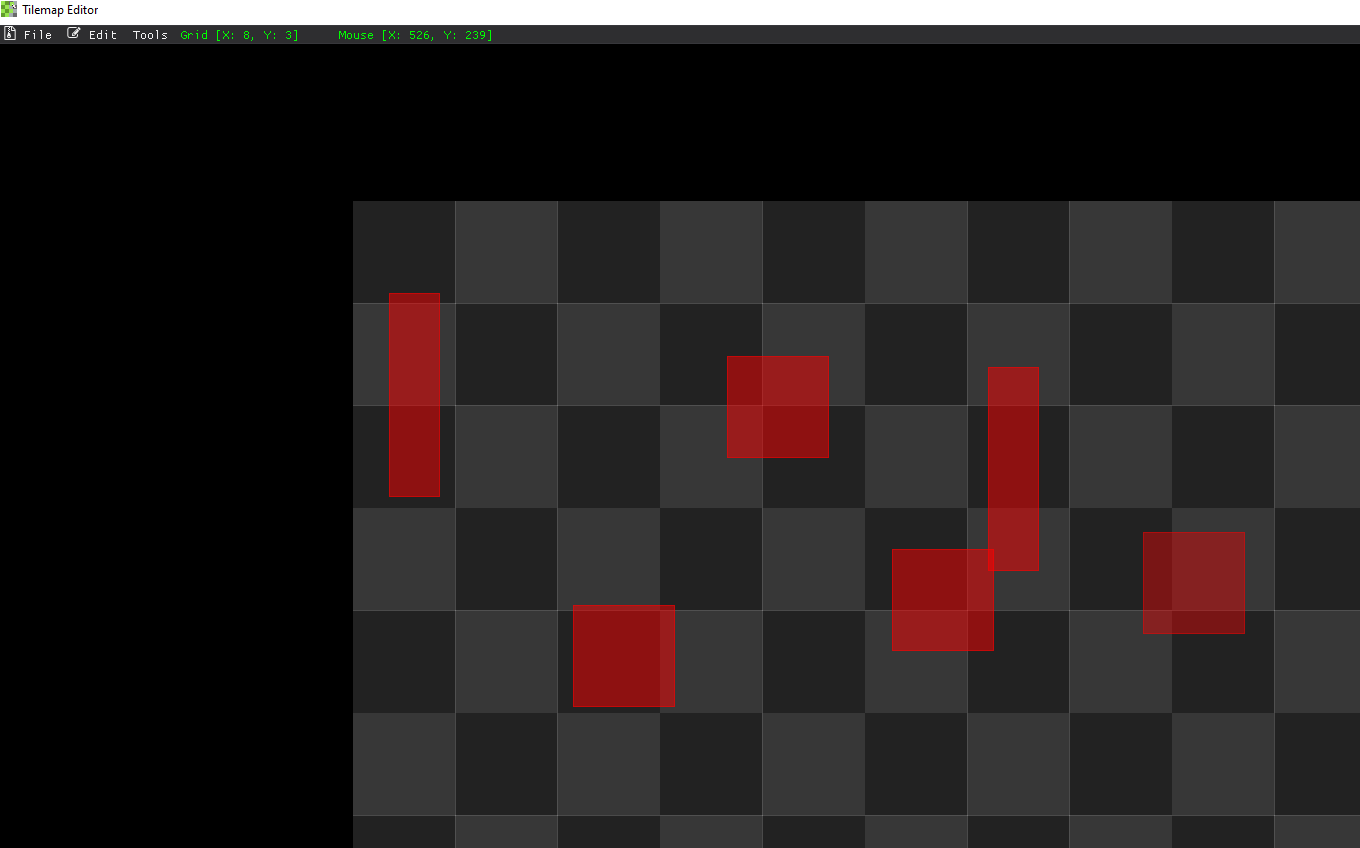 Some randomly placed box colliders
Box Colliders are created and removed in the same way as when creating tiles. Left Mouse Button places a new collider. Right Mouse Button removes a collider.
Changing Canvas Size
You are able to change the canvas width and height by going to the Edit option in the menu bar.
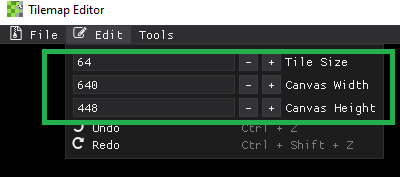
You can change the canvas size in increments based on the Tile Size by clicking on the -/+ buttons, or you can type in the size that you want. The smallest tile size that we can use is an [8x8] tile.
Saving and Loading
You are able to save and load your tilemap projects in JADE. When you save there are two files that are created:
-
Project [.lua] File
- This is a file that holds all the information about your project. Asset Id names, filepaths, and the filepath to the .map files for the colliders and the tiles
-
Tile [.map] File
- The [.map] file is a txt file that contains all of the information about that tile. Asset ID, collider, width, etc.
-
Collider [.map] File (optional)
- There may be a case where you want to create colliders that are not associated with a specific tile. Therefore we have the colliders .map file. It has the same information as the tiles .map file, without the sprite information.
The _colliders.map file is only created if there are box colliders in your tilemap.
Saving Your Projects
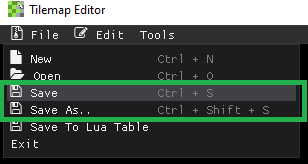
To save your project, go to the File menu and select either Save or Save As...:
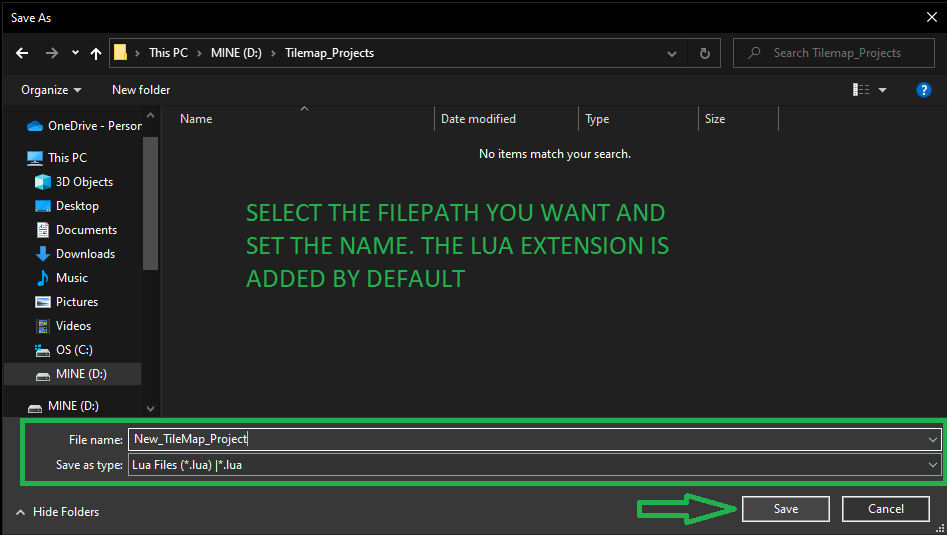
If you have not yet saved your project, a file dialog will open allowing you to choose the location that you want your project to be in. By default, the project is saved as a .lua file.
After saving there should be two files generated automatically for you (three if colliders are created!):
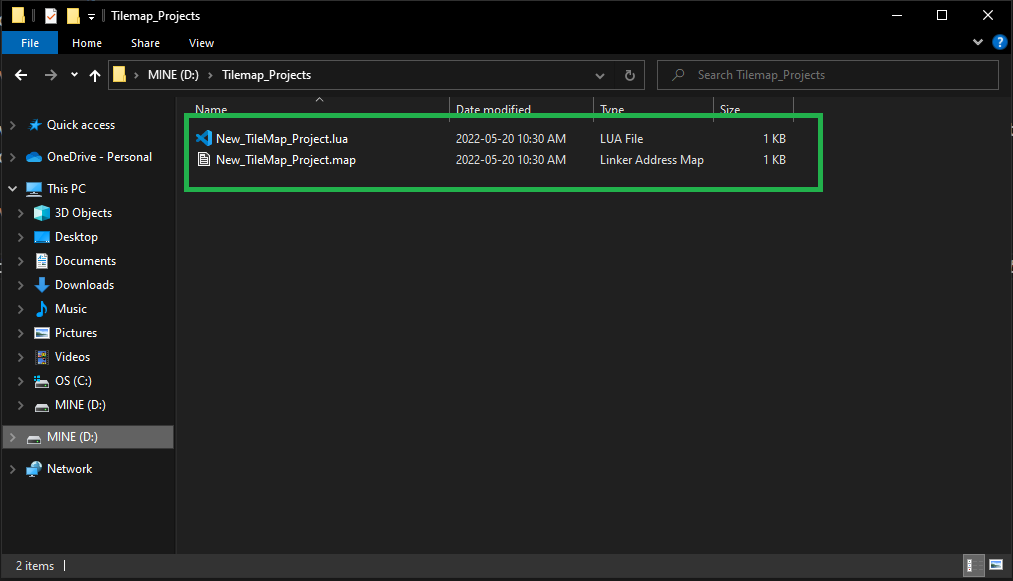
The .lua file is your project file. The project file contains a list of the assets, filepaths, and map paths to be used when loading a project and generating a tilemap.
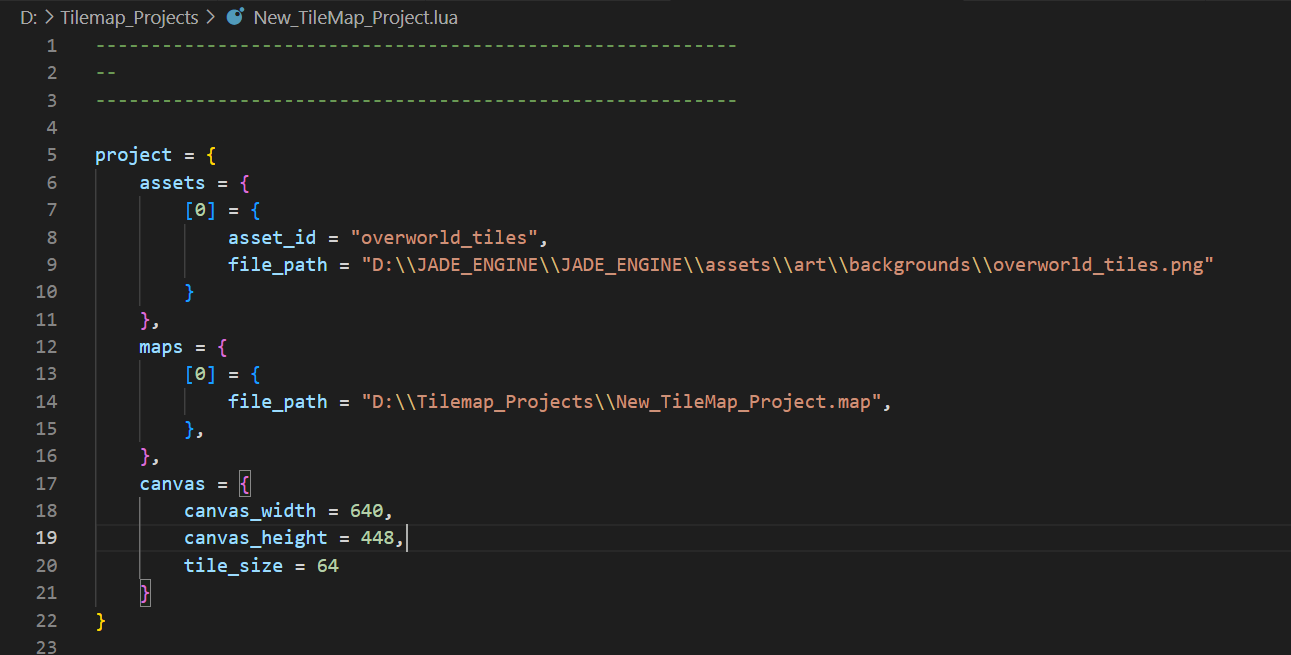 Example of a saved project lua file!
As you can see from the example above, the lua file holds the specific paths of the assets and the maps; therefore, if you move the files to a different drive or location, you must update the path before you can properly load the project again. To change the path, simply open the .lua file in any text editor and change it to the new desired path.
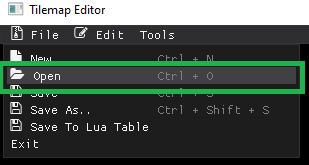
Loading Your Projects
To load your already saved project, go to the File menu and select the Open menu item or hit the Ctrl+O key shortcut.
This will open a Open File Dialog. Now all you have to do is search for your project, select it, and open your project:

This will read your saved project file and load all the tiles, assets (tilesets), and colliders from based on the saved .map files.
the tilesets are automatically loaded for that project, so you can just continue to work on your desired project.
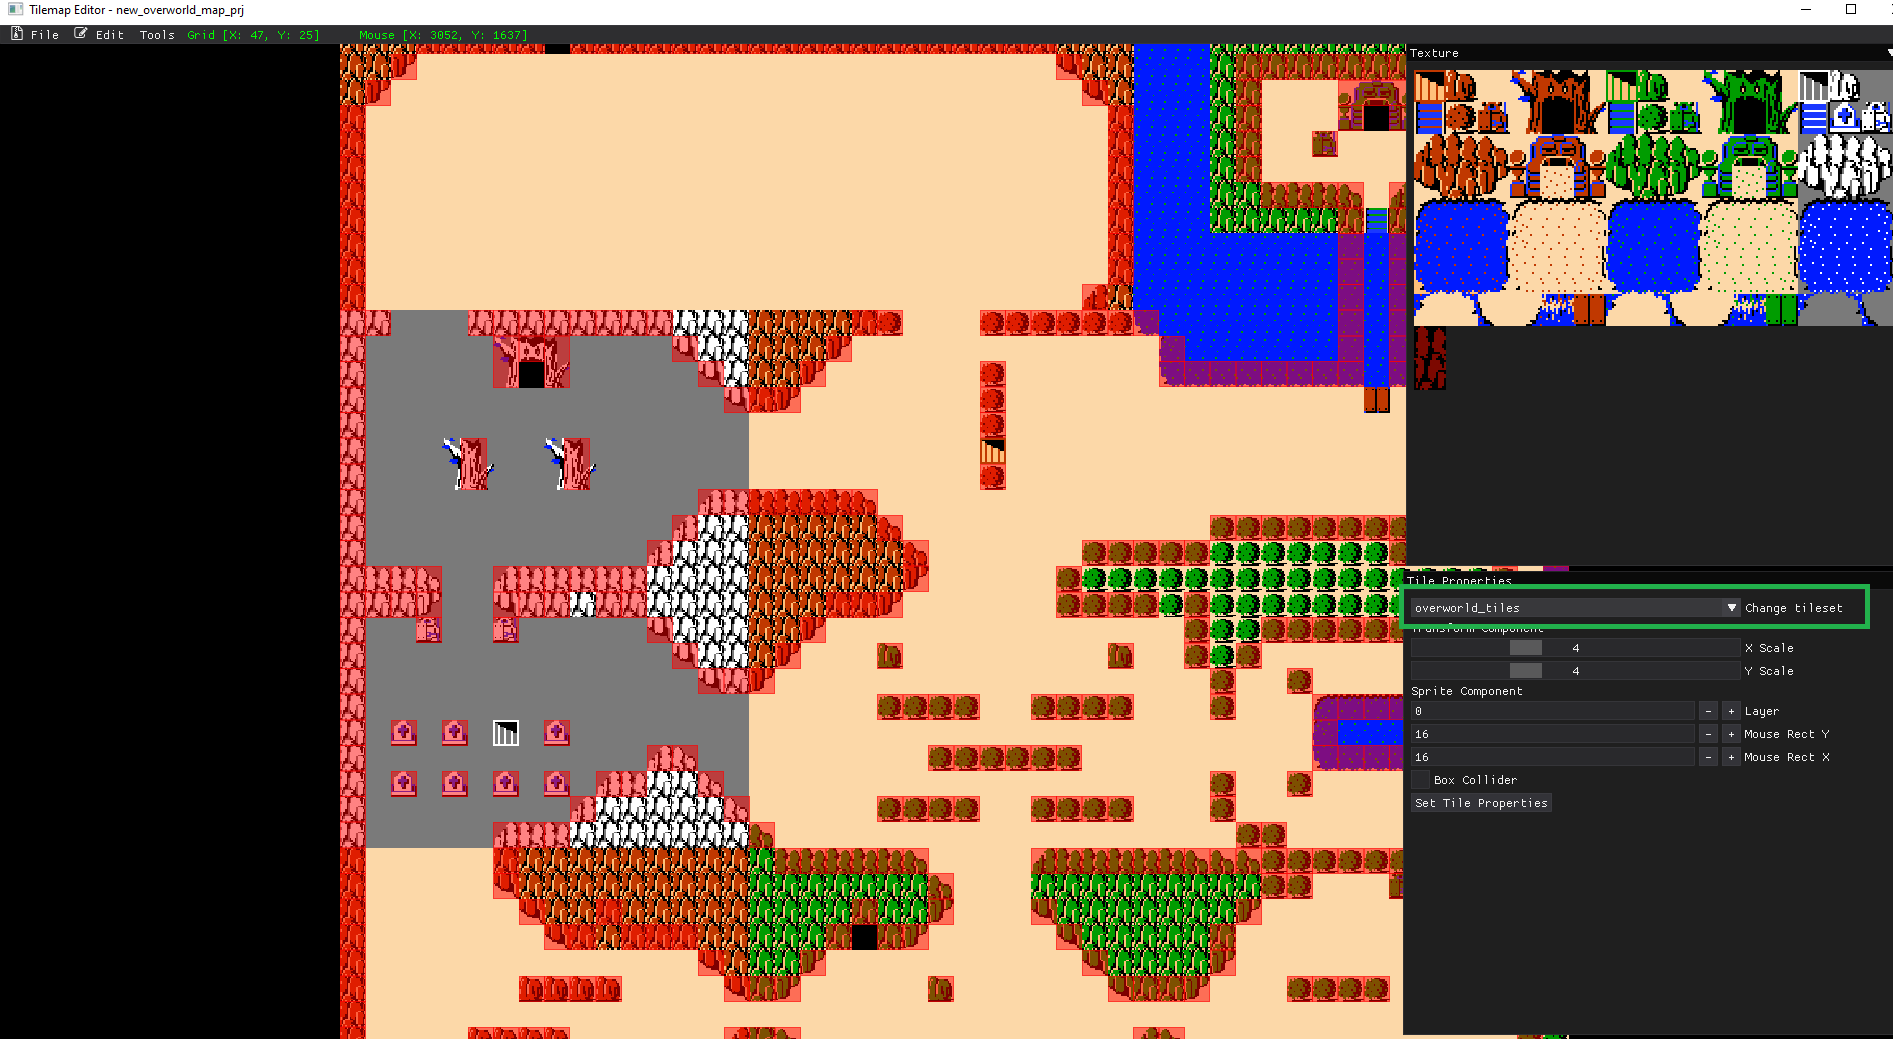 This is an example of a re-loaded map. It shows the pre-loaded tileset
When loading a map, we must ensure that the path to the assets have not changed! If you load the project and no tile sprites are present. Open the project.lua file in your text editor of choice, and check to see if the path for the assets and .map files are correct.
If the paths are not correct, change them accordingly and reload the map!
Saving map to a Lua File
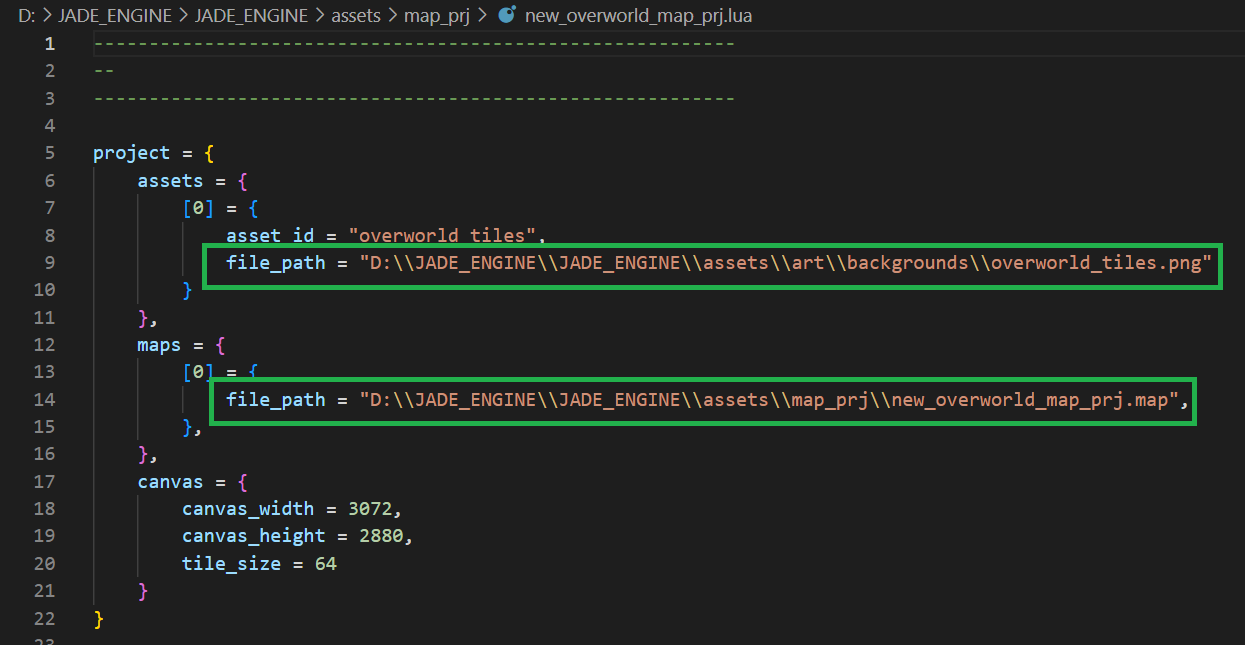
If you are using the JADE_ENGINE for creating a game, you can save the map to a formatted lua file!
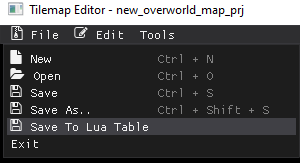
This will create a pre-formatted map that has the necessary tables needed for when loading a map in the JADE_ENGINE! If you have to source code, you can always change the saving to lua table to suit your own needs.
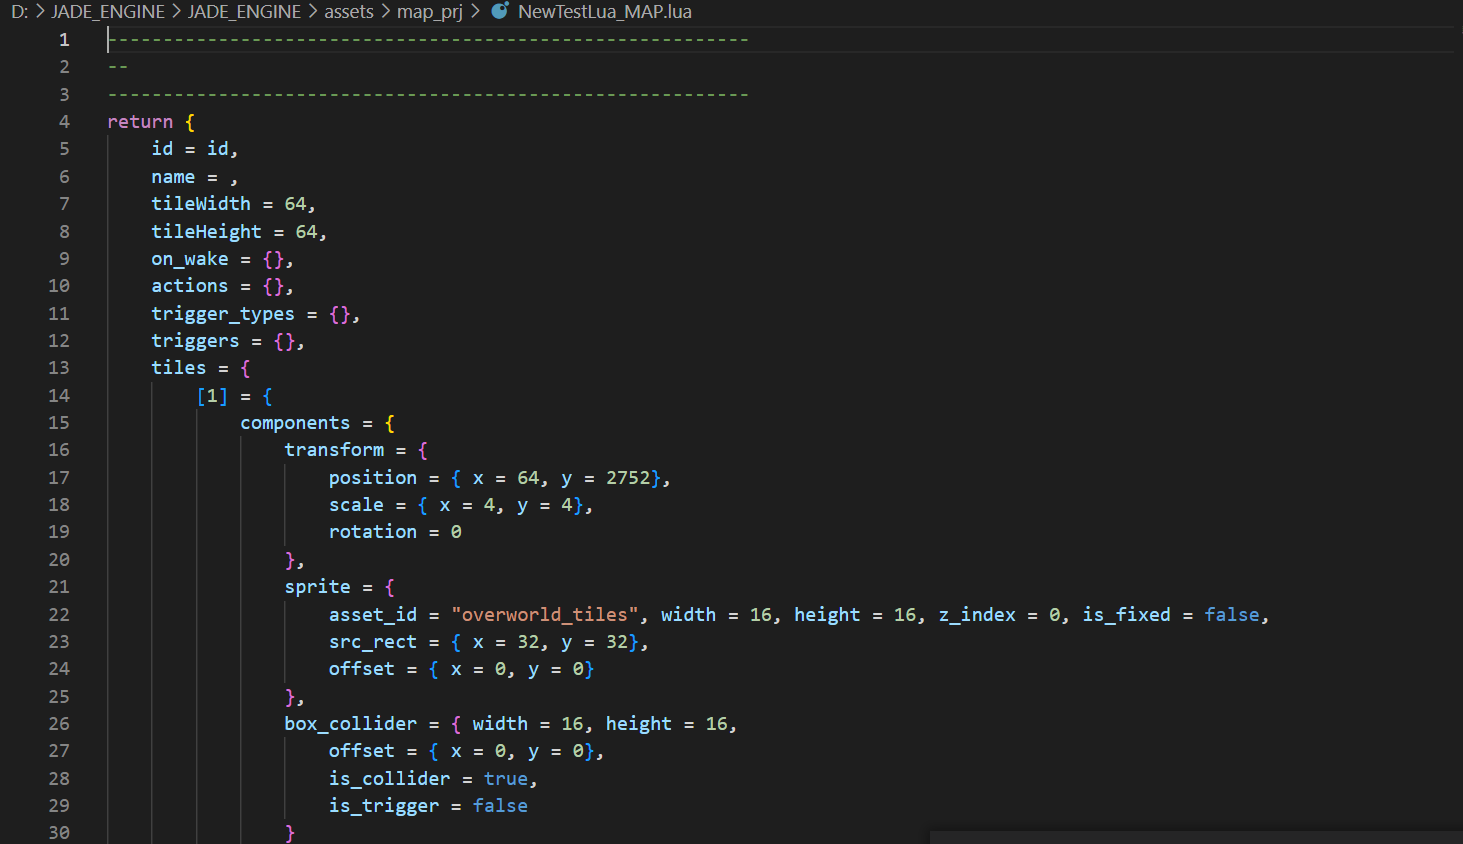 example of a lua table map file for the JADE_ENGINE